-
Courses
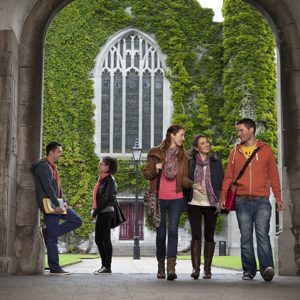
Courses
Choosing a course is one of the most important decisions you'll ever make! View our courses and see what our students and lecturers have to say about the courses you are interested in at the links below.
-
University Life
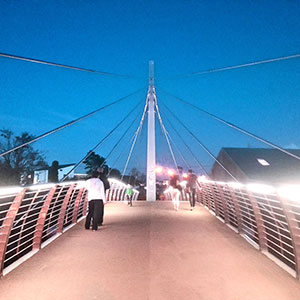
University Life
Each year more than 4,000 choose University of Galway as their University of choice. Find out what life at University of Galway is all about here.
-
About University of Galway
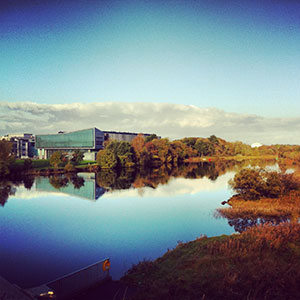
About University of Galway
Since 1845, University of Galway has been sharing the highest quality teaching and research with Ireland and the world. Find out what makes our University so special – from our distinguished history to the latest news and campus developments.
-
Colleges & Schools
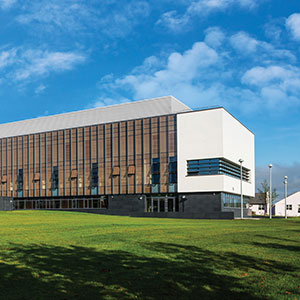
Colleges & Schools
University of Galway has earned international recognition as a research-led university with a commitment to top quality teaching across a range of key areas of expertise.
-
Research & Innovation
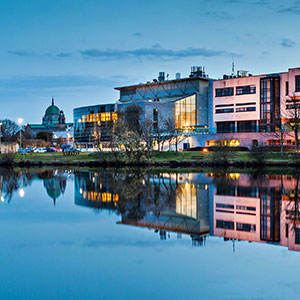
Research & Innovation
University of Galway’s vibrant research community take on some of the most pressing challenges of our times.
-
Business & Industry
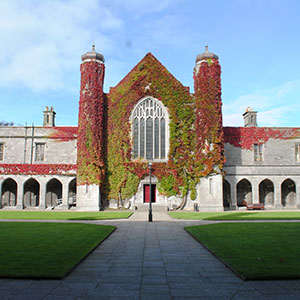
Guiding Breakthrough Research at University of Galway
We explore and facilitate commercial opportunities for the research community at University of Galway, as well as facilitating industry partnership.
-
Alumni & Friends

Alumni & Friends
There are 128,000 University of Galway alumni worldwide. Stay connected to your alumni community! Join our social networks and update your details online.
-
Community Engagement
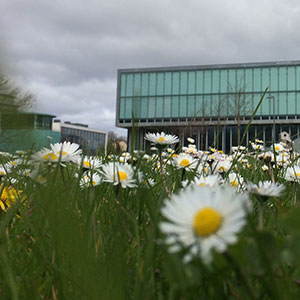
Community Engagement
At University of Galway, we believe that the best learning takes place when you apply what you learn in a real world context. That's why many of our courses include work placements or community projects.
Links
Link-related FAQs are shown below:
How do I add automatically-generated links to sub-pages?
The CMS usually does this for you - in the left navigation menu. But if you choose to hide the left navigation bar (by making the page Widescreen or Ultra-Wide), you'll need to replace the menu you've just hidden with links to the same pages.
The easiest way to do this is to include an 'Widescreen Navigation' content type, which will automatically insert big buttons on your page - one for each of the links that would normally appear in your left menu.
You can see an example of these buttons on the T4 example page.
How can I create a Call to Action link
CTA links take up the full width of the screen but on small screens, you can stick it to the bottom of the screen (so they're always visible).
You can have 1, 2, or 3 buttons on the line.
There is no content type for this (yet) but you can add them by following these steps:
For single call to action buttons, follow the steps for a maroon information banner, which can be a link.
- Go to root » NUI Galway » Training » Training Examples » Advanced Hacks (not previewable) » Links
- Duplicate one of the following to your own website: Click on the Actions button beside the one you want to use and choose Duplicate.
- Full Width CTA (Call To Action) Link that's always on bottom of small screens
- 2 CTA Links (always visible on small screens)
- 3 CTA Links (always visible on small screens) - The site structure will appear, click on the section of your site where you want the CTA to appear.
- Note: You will be brought back to the Advanced Hacks section, you need to Cancel out of this section, return to the site structure and find your site again.
- Go to your own site and the section where you duplicated the CTA content.
- Edit the HTML inside the content you copied - you'll see instructions to follow when you go into it
- Save and approve your content
How do you add rows of coloured blocks - each one a different link?
There's no content type for this (yet) but you can do this with an 'NUIG Code Only'.
- Go to root » NUI Galway » Training » Training Examples » Advanced Hacks (not previewable) » Links in Site Manager
- Duplicate the content called 'Coloured Link Blocks' to your own section. Click on the Actions button and choose Duplicate.
- The site structure will appear, click on the section of your site where you want the coloured box to appear.
- Note: You will be brought back to the Advanced Hacks section, you need to Cancel out of this section, return to the site structure and find your site again.
- Go to your own site and the section you duplicated the content to.
- Edit your copy of the content and when you are finished click on Save and approve
You can have as many link blocks as you like. Each one is defined as follows:
<div class="slimLink colour">
<a href="web address to link to">Label</a>
</div>
Dark Colours
(Black link text for WAI-AA Compatibility)
Light Colours
(Black link text for WAI-AA Compatibility)
How do you link to a document?
- Edit some content.
- Place the cursor where you want the link to appear.
- Click on the Insert Media button

- Search your media library for the document to include.
- or Upload your document to the media library (see how)
- Click on the Actions Button and choose 'Select media' or click on the document’s name to insert the link
- Double-click on the link to see the media attributes, and change the name if required
How do you link to a downloadable file?
Option 1: Use the media library
All office documents can be downloaded by the user - even if they are viewed in the browser when the user clicks on the link to them.
If your document is larger than 15MB, you cannot add it to the media library.
However, you can reduce the filesize by web optimising the images it contains. Online tools (e.g. wecompress.com) allow you to do this very quickly.
Then you can simply add the document to the media library and link to it in your webpage. Site manager will then upload the file to your website so it can be downloaded by your users.
Common issue
SM only uploads media library files it knows you have linked to.
If you use the 'Insert Media' button (![]() ), it knows about the file so everything is fine. But if you type its web address anywhere, the CMS won't know about the image - it will assume you've typed an external link and will ignore what you typed.
), it knows about the file so everything is fine. But if you type its web address anywhere, the CMS won't know about the image - it will assume you've typed an external link and will ignore what you typed.
So direct links, buttons, or promo image boxes that link to, say, a PDF file may not always work - simply because Site Manager didn't know it had to upload the file the link references.
In this case, the easiest fix is to link to the file (correctly) inside a published page, making the CMS upload it.
Often, the problem arises because someone linked to the media file using ![]() instead of
instead of ![]() . This incorrect approach may appear to work perfectly for a while but this is only because another page is linking to the same media library file, correctly (thereby telling the CMS to upload the file to the University web servers). But if there ever comes a time when no live page is linking to the file correctly, the CMS will remove the file, thinking it is no longer in use. At this point, any remaining link to the media item, that was created using
. This incorrect approach may appear to work perfectly for a while but this is only because another page is linking to the same media library file, correctly (thereby telling the CMS to upload the file to the University web servers). But if there ever comes a time when no live page is linking to the file correctly, the CMS will remove the file, thinking it is no longer in use. At this point, any remaining link to the media item, that was created using ![]() , will stop working.
, will stop working.
Another fix (available to Power Users and Administrators only) is to tell SM to auto-upload all files of a certain type - regardless of whether there is a link to that file anywhere on the site.
Option 2: Use OneDrive
For files that (a) cannot be reduced to below 15MB, or (b) are not office documents, you should upload it to OneDrive (Microsoft's cloud-based storage) and add a link to it on your webpage:
- Log into office.com (with your University account)
- Use the waffle menu (top left) and choose OneDrive. Or else click on the cloud icon on the left bar.
- Upload your file (look for the upload button near the top of the screen).
- When the file is listed in Onedrive, hover over it and click the share button (or else right-click it and select 'share').
A 'Send Link' popup appears. - Change who can view the file and copy the link:
a. At the bottom (Under 'Copy Link'), it says 'People you specify can view'. Click this.
b. Click 'Anyone with the link'
c. Click 'Apply'
d. The link appears - click the copy button. - In another tab, go to site manager and edit your page's section. Add an external link (use Ctrl-V [PC] or Cmd-V [mac] to paste in the copied link address).
How do you link to a part of a page?
To enable a link to an specific part of a page,:
- First, edit/create a 'Content (no title)'
- Give it a Name (suggestion - anchor name)
- Add an anchor by clicking on the Insert tab
- Choose Insert Link for a dropdown menu to appear
- Choose Insert anchor
- Give your anchor a unique name (do not include the #)
- Save and approve the new content
- Position this content item in the specific place on your page where you want the anchor to be by clicking on the Crosshair (Order column) to drag and drop the item.
Wait for it to publish and then you can browse/link to the page's normal web address, followed by #yourAnchorsName
The anchor is invisible on the live site but clicking this link will load the page auto-scrolled down to the place where the anchor was inserted. The browser tries to place the anchor at the top of the screen (or as near as the page-length will allow).
How do you link to a particular FAQ in a page?
Link to the page's URL but add on '#', followed by the unique Anchor ID you gave the FAQ.
E.g. https://www.universityofgalway.ie/t4training/examples/faqs/#beauty
How do you link to a specific tab in a tabbed page?
Just add #tab1, #tab2, #tab3, #tab4, or #tab5 to the web address of the page.
You'll need to link to it as you would an external link.
How do you link to an email address?
HTML supports a mailto: link, where you create an external link to, say, mailto:webmaster@nuigalway.ie
But don't use this - the email address will be picked up by spambots that scan websites for active email adddresses.
Instead, create an external link by highlighting the text you want to turn into a link and clicking on the 'Insert/Edit Link' button.
For the Link URL, type javascript:mail('webmaster');
Put the start of your email adddress (everything beforethe @) inside the single quotes - e.g. javascript:mail('joe.bloggs');
The links, above, would email webmaster@nuigalway.ie and joe.bloggs@nuigalway.ie (it automatically adds the @nuigalway.ie when someone clicks the link).
Demonstration: Send Email
If you need your link to email a non-nuigalway address, do it like this:
javascript:mail('somebody*somesite.ie');
Note the asterisk (*) instead of a commercial at sign (@). This is so that spambots won't recognise it as an email address.
You could also add a suggested subject line, which will be auto-inserted into the 'compose email' window that the user will see when they click on the link:
E.g: javascript:mail('webmaster', 'Website Feedback');
or javascript:mail('me*mysite.com', 'Online Contact');
How do you Link to another page?
Many content types use the rich text editor this allows you to add text and images, and turn specific words/images into links.
If you want to add an link inside this editor, simply:
- Edit some content.
- Highlight the text (or click on the image) to turn into a link.
- To link to another page (section) or part of a page (content) in Site Manager, use
 and choose
'Insert section link' or
'Insert content link'
To link to a page on an external website. use and choose
'Link to external site'
Other content types always have a link feature built into them - in this case, they'll specifically ask you to select the section (page) in site manager you want to link to OR type in the web address to link to. Only fill in one of these and leave the other field blank.
How do you link to the hidden content in an accordion content type?
Put an anchor anywhere in the hidden segment - go to the Insert tab, hover over Insert link, choose Insert anchor - Remember the name you give it and click 'Save and approve'.
If you're planning to email the link, wait an hour (for it to publish out to the live website) before testing it.
If you're putting the link on another webpage, you can add it to t4 immediately because both changes will publish out at the same time.
But link to the page's web address as though it were an external link, tagging on '#your-anchor-name' at the end.
Example: http://www.nuigalway.ie/t4training/examples/accordion/index.html#linking
How do you make a link a button?
To change your link to appear as a button follow the instructions below:
Add the text you wish to appear as a button to your page,
Select all the text you want to appear within the button and click on the Format tab and choose Formats > Custom Formats > t4button (the first option),
With the text still selected click on the Insert/Edit Link option in the ribbon above
When the pop up appears complete each field as per below
- Link URL - Add the URL link for the page you wish to link to
- Target – Choose ‘Open in New Window (_blank)’
- Title – Put a meaningful description in to this field - (this is required for any one using assistive technology to read the page, do not include text such as 'Link to...' )
The resulting button will look like this:
How do you make a link only work after a certain date/time?
Websites do not do this normally so you need to enable this functionality using JavaScript:
- Go to root » NUI Galway » T4 Training » Training » Training Examples » Advanced Hacks » Links
- Duplicate the content called 'Enable Scheduled Links' to your own section. Click on the Actions button and choose Duplicate.
The site structure will load up - with a difference: At the top it will say 'Duplicate content. Choose destination'. - Find the section you want to add scheduled links to. Expand sections with their plus buttons if you need to but be careful not to click on any section names until you've found the one you want to copy this content to. Whatever section you click on will have the content copied to it.
- Note: You will be brought back to the Advanced Hacks section, you need to Cancel out of this section, return to the site structure and find your site again.
- Click on
 to return to the site structure. Find the section you just copied the content to and modify its content.
 - 'Enable Scheduled Links' will be in the content list but its status will be 'Pending'.
Modify it and immediately and click on 'Save and approve'.
Now your page is able to have scheduled links.
To add scheduled links to it:
- Type your link text
- Select the text
- Click

- Choose 'Link to external site'
- Use this exact format for the link URL:
javascript:linkTo('web-address',yyyy,mm,dd,hr,mins);E.g. To make a link to NUI Galway's home page start working on October 3, 2021, at 2:30pm, use:
javascript:linkTo('http://www.nuigalway.ie',2021,10,3,14,15);It's important that you put no spaces in this text!
Also, do not set the link target - Links will open in a new tab by default. If you don't want this to happen, add '_self' to the linkTo command. E.g:
javascript:linkTo('http://www.nuigalway.ie',2021,10,3,14,15,'_self');
Add as many such links as you need to your page.
Demonstration: (This link will not work until Christmas Day 2021 but, after that, it will work like any normal link): Scheduled Link
How do you turn an image into a link?
Foreground images, uploaded to the Media Library, can be added to any content type that uses the WYSIWYG editor. Once added, they can be turned into links by right-clicking on the image, and clicking 'Insert Link'.
Several Content Types allow you to add an image, making it a link. These are listed on the Images FAQ page: Which Content Types allow me to link to another page?
Some of these content types expect you to select a background image, from the Media Library.
Others expect you to to attach an image directly to the content type.
And each content type expects the image to be a different size. To see what size to make it, whether to upload the file to the media library or attach it directly, and how to resize it, see the Image Resizing FAQ page.
How do you turn different parts of an image into links?
You do this by first sizing the image for your page and then defining an image map, which tells the browsers which bits of the image are clickable.
Full information is available here: Creating Image Maps
Which Content Types allow me to link to another page?
You can turn text and foreground images into links in any content type that uses the WYSIWYG editor, e.g.:
- 3D Content Panel
- Content (Rich Text)
- Content (no title)
But there are lots of other content types that will allow you to link to things in a variety of ways:
Linking to Pages
- Content block (with or without image) (Coloured block containing text and a big link button)
- Homepage Hero Image Carousel (Vertically scrolling large images with impactful overlaid text, each linking to their own page - designed for the NUI Galway home page)
- Widescreen Landing Page Hero Carousel (Horizontally scrolling large images with impactful overlaid text, each linking to their own page)
- Icon Links (Multiple green icons - 35 to choose from)
- Image Slider (large images, sliding from the right onto the screen, each one overlaying the previous, and each linking to a different page)
- Large Video (Coloured block with a large embedded YouTube video, and a right panel containing a headline, info text and a large link)
- Promo Box Large (like a content block with image but teal green background)
- 2- or 3-promo image Boxes (Labelled images with overlaid text when you hover over them)
- Sidebar Content Box (coloured box, sized to fit in a sidebar with headline, text and optional 'Learn More' link to another page)
- Widescreen Promo Images: 2-Columns or 3-Columns (Static Image, Headline, Info text and 1 or 2 links in each column)
- Widescreen Navigation: This content type will auto generate big buttons on your screen, linking to the same pages that your left navigation points to. It is intended for use on widescreen pages, where the left navigation is not visible. A good example of this is the t4 examples page.
Linking to Photos:
- Lightbox Image Gallery (Link to static photos)
- Standard Media Gallery (links to exactly 7 photos or videos)
Linking to Staff Profiles:
- IRIS Staff Contact Cards (link to staff profiles)
Linking to YouTube Videos:
- Interactive Video Gallery (links to exactly 3 YouTube videos)
- YouTube Videos (Multiple) (links to up to 5 YouTube videos)
- Standard Media Gallery (links to exactly 7 photos or videos)
- Shared Embedded YouTube Viewer (links to as many videos as you like)
- Static Video (thumbnail, and description - embedded YouTube video appears in a lightbox on click)
- YouTube Sidebar box (Headline, thumbnail, and description in a coloured box, designed to fit in your page's sidebar - embedded YouTube video appears in a lightbox on click)
Why doesn't the Overview Button work?
The 'Overview' button won't work in Site Manager's Preview or Direct Edit because it's designed to work in the published environment and these don't emulate it completely.
The 'Overview' button is inserted into the left-nav automatically by the page layout and works (on the live site) like this:
It looks at your first menu item to see where, in the site hierarchy, this site is – then it brings you up a level from there.
E.g. if the first menu item is a link to http://www.nuigalway.ie/about-us/jobs/
Then the overview button brings you to http://www.nuigalway.ie/about-us/
So this assumes the first item in your menu is a normal section (i.e. a page in your site). If you put a section link (to, say, the media library) as the first item, your overview button will point to a level up from its location - which may not even contain a webpage (resulting in an 'Access Denied' error).
See how this content type looks in different page types:
With Rightbar, Without Rightbar, Widescreen, and Ultra-Wide (sub-site) / Ultra-Wide (top-level) pages
or else
Normal, Widescreen, and Ultra-Wide (Sub-Site) / Ultra-Wide (Top-Level) Landing pages
Note: You change a page's width (and other options) using its section's DC.Keywords field - see the interactive demonstration for full information.


